Pork belly is a rich cut of meat with layers of fat and meat that create amazing flavor and texture when cooked properly. The air fryer transforms this fatty cut into crispy, golden bites with tender insides. Traditional methods require long roasting times and careful temperature watching, but the air fryer simplifies everything.
The circulating hot air renders the fat, dries the surface, and creates a crispy crust in much less time. The result is restaurant-quality pork belly bites that are crunchy outside and juicy inside without needing hours of cooking or constant attention.
Understanding the Two-Stage Cooking Method
Cooking pork belly successfully requires two distinct phases that serve different purposes. The first phase uses lower heat to melt the fat inside the meat slowly. This rendering process removes excess grease and makes the meat tender without burning the outside. The second phase uses high heat to create the crispy golden crust everyone loves. Skipping either phase produces poor results.
Low heat alone leaves the outside pale and soft. High heat alone burns the outside before the fat renders properly. Using both phases in order creates the perfect balance of crispy exterior and tender interior.
Why Fat Rendering Matters So Much
Pork belly contains a lot of fat, which is both a challenge and an advantage. The fat must melt and drain away during cooking, or the finished bites will taste greasy and have a rubbery texture. When fat renders properly, it melts into liquid and escapes from the meat, leaving behind a tender structure.
The air fryer basket allows this melted fat to drip away from the meat as it cooks. This drainage is critical for achieving non-greasy results. Proper fat rendering also creates space in the meat structure that becomes crispy when exposed to high heat in the second cooking phase.
Choosing and Preparing the Right Pork Belly
Good pork belly has balanced layers of fat and meat rather than being mostly fat or mostly lean. Look for pieces with even striping of white fat and pink meat. The skin may be on or off depending on availability and preference. Cut the pork belly into cubes that are two to three centimeters on each side. Uniform size ensures even cooking.
Smaller pieces cook faster but may dry out, while larger pieces take longer and may not crisp as well. After cutting, pat every piece completely dry with paper towels. Moisture on the surface prevents crisping, so this drying step is one of the most important in the entire recipe.
The Critical Role of Surface Drying
Moisture is the enemy of crispy texture. Water on the meat surface must evaporate before browning can occur. If you skip the drying step, steam forms around the pork belly during cooking instead of a crisp crust. Pat each piece thoroughly with paper towels until no moisture remains. Some cooks even let the cut pork belly sit uncovered in the refrigerator for several hours to dry the surface further. This extra step is optional but produces even crispier results. The drier the surface before cooking begins, the better your final crust will be.
Building Flavor Through Seasoning
Simple seasonings work best because pork belly already has rich flavor. Salt is the most important seasoning because it enhances the natural pork taste and helps draw out surface moisture. Black pepper adds a subtle spicy note. Garlic powder contributes savory depth without the moisture that fresh garlic would add. Paprika creates color and a mild sweet flavor. Mix these dry seasonings together before tossing with the pork belly cubes. Make sure every piece is evenly coated. The seasoning sticks better if you toss the meat while it is still slightly damp, then let it dry again before cooking.
Optional Marinades for Different Flavors
While dry seasoning works perfectly, marinades add another flavor dimension. Soy sauce provides salty umami taste and helps with browning. A small amount of vinegar adds tang and helps tenderize the meat. Honey or a sugar-free sweetener creates caramelization and balancing sweetness. If using a wet marinade, keep the marinating time to thirty to sixty minutes. Longer marinating does not improve results much and can make the meat too salty. After marinating, pat the pork belly dry again before air frying. This removes excess liquid that would prevent crisping.
Preheating the Air Fryer
Preheating ensures the cooking environment is ready when the pork belly goes in. Set your air fryer to one hundred eighty degrees Celsius or three hundred fifty degrees Fahrenheit and let it run empty for three to five minutes. Starting with a preheated air fryer means the rendering phase begins immediately. Cold starts can cause uneven cooking because the temperature rises gradually. Most air fryer models have a preheat function, but if yours does not, simply run it at the desired temperature for a few minutes before adding food.
The Rendering Phase Explained
Place the seasoned pork belly cubes in the air fryer basket in a single layer with some space between pieces. Cook at one hundred eighty degrees Celsius for eighteen to twenty-five minutes. The exact time depends on how fatty your pork belly is and how large you cut the pieces. During this phase, fat melts and drips into the bottom of the air fryer. Shake the basket every five to seven minutes to ensure even cooking and prevent pieces from sticking together. You will see fat collecting in the bottom drawer. This is exactly what should happen.
Draining Excess Fat Before Crisping
After the rendering phase, carefully remove the air fryer basket and pour off the accumulated fat. This step prevents the pork belly from sitting in grease during the high-heat crisping phase. If the meat stays in contact with melted fat, it cannot get crispy. Tilt the basket over a heat-safe container to drain the fat. Some people save this rendered pork fat for cooking other dishes because it has excellent flavor. Return the basket to the air fryer immediately after draining so the meat stays hot for the next cooking phase.
The High-Heat Crisping Phase
Increase the air fryer temperature to two hundred to two hundred five degrees Celsius, which is three hundred ninety-two to four hundred one degrees Fahrenheit. Cook for eight to fifteen minutes, shaking the basket every few minutes. Watch carefully during this phase because the pork belly can go from perfectly golden to burnt quickly at high heat. The surface will become deeply brown and crispy. You will hear the fat sizzling and see the edges becoming crunchy. The pork belly is done when the exterior is dark golden brown and crispy to the touch.
Why Resting Time Improves Texture
After removing the pork belly from the air fryer, let it rest for five to ten minutes before serving. Resting allows the juices inside the meat to redistribute evenly. If you cut or bite into the pork immediately, these juices run out and the meat becomes drier. Resting also lets the crust firm up slightly, making it even crispier. The internal temperature drops just enough to make eating comfortable while the exterior stays crunchy. Resist the temptation to eat them immediately, even though they smell amazing. The wait improves both texture and flavor.
Achieving the Perfect Texture Balance
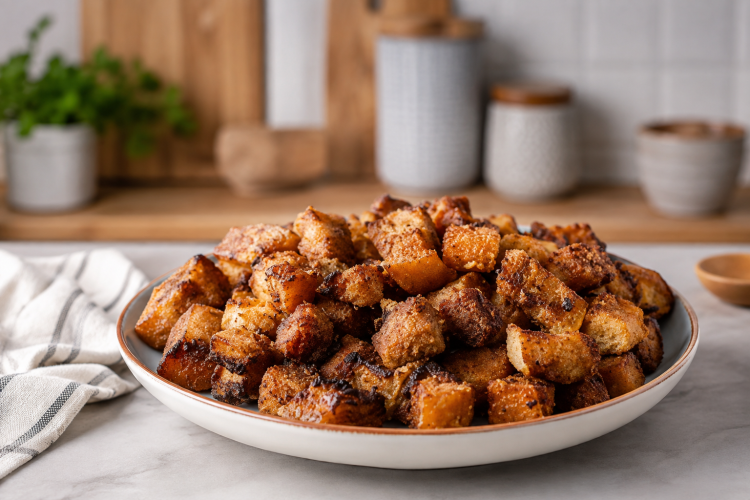
Perfect pork belly bites have a deep golden-brown crust that crunches when you bite it. The fat layer should be fully rendered and soft, not rubbery or chewy. The meat itself stays tender and juicy. There should be no greasy coating or oily mouthfeel. Each bite delivers a combination of crispy bacon-like edges and tender roasted pork center. The texture should be firm enough to pick up with your fingers but tender enough to chew easily. This balance comes from proper rendering at low heat followed by effective crisping at high heat.
Common Problems and Their Solutions
If your pork belly is not crispy enough, the surface was probably too wet before cooking. Always dry the meat thoroughly and consider the optional refrigerator drying step. If the bites are too greasy, the rendering phase was too short. Extend the low-heat cooking time by five to ten minutes. If the outside burns before the inside cooks, you used high heat too early. Always complete the low-heat rendering phase before increasing temperature. If the fat is chewy rather than tender, the total cooking time was too short. Add more time to the rendering phase.
Flavor Variations for Different Tastes
The basic recipe is delicious, but variations create different flavor profiles. For honey garlic pork belly, toss the finished bites with a mixture of honey, minced garlic, and soy sauce. For a spicy version, add chili flakes to the dry seasoning or toss finished bites in hot sauce. For Asian-style pork belly, marinate in soy sauce, ginger, and sesame oil before cooking. For a keto-friendly sweet version, use sugar-free maple syrup or monk fruit sweetener. For barbecue glazed bites, toss them in your favorite barbecue sauce immediately after the final cooking phase while they are still hot.
Serving Ideas for Different Meals
Pork belly bites work in many meal contexts. Serve them over steamed rice with stir-fried vegetables for a complete dinner. Add them to noodle bowls with broth and greens. Use them as a protein in lettuce wraps with fresh herbs and vegetables. Serve them as an appetizer at parties with toothpicks and dipping sauces. Add them to salads for a crispy, rich protein topping. Put them in tacos with cabbage slaw and spicy mayo. Eat them as a high-protein snack between meals. Their rich flavor means a small portion is very satisfying.
Best Dipping Sauces
Pork belly bites pair well with many sauces that add moisture and complementary flavors. Spicy mayo made with mayonnaise and sriracha provides creamy heat. Soy-ginger sauce with fresh grated ginger adds Asian flavors. Sweet chili sauce offers sweet and spicy contrast. Barbecue sauce creates familiar comfort food taste. Mustard-based sauces cut through the richness with tang. Garlic aioli adds creamy garlic flavor. Make a quick dipping sauce by mixing equal parts soy sauce and rice vinegar with a small amount of sesame oil and chopped green onions.
Storage and Reheating Instructions
Store leftover pork belly bites in an airtight container in the refrigerator for three to four days. Let them cool completely before sealing to prevent condensation. To reheat, use the air fryer rather than the microwave. Set the air fryer to one hundred eighty degrees Celsius and heat for three to five minutes until hot and crispy again. The air fryer restores the crispy texture that microwaving cannot match. Microwaved pork belly becomes soft and chewy rather than crispy. If you must use a microwave, reheat on a paper towel to absorb some moisture, but expect softer results.
Understanding Nutritional Content
Pork belly is a high-fat, high-protein food with minimal carbohydrates. Each serving provides substantial protein that helps with satiety and muscle maintenance. The fat content is high but much of it renders out during cooking and drains away. The remaining fat includes both saturated and monounsaturated types. Pork belly also provides B vitamins, selenium, and zinc. While calorie-dense, the rich flavor and high protein mean small portions are filling. For those following low-carb or ketogenic diets, pork belly fits perfectly. For calorie-restricted diets, enjoy smaller portions and pair with plenty of vegetables.
Why Air Frying Works Better Than Other Methods
Traditional oven roasting requires preheating a large oven and takes much longer to achieve similar results. Pan frying creates smoke and splattering while requiring constant attention. Deep frying uses excessive oil and creates cleanup challenges. The air fryer combines the best aspects of all these methods. It crisps like deep frying without the oil, roasts like an oven in less time, and browns like pan frying without the mess. The circulating air reaches all surfaces of the pork belly evenly, creating consistent results that are difficult to achieve with other home cooking methods.
Adjusting for Different Air Fryer Models
Air fryers vary in power and design, which affects cooking times. Basket-style air fryers work well for pork belly because fat drains into the drawer below. Oven-style air fryers with racks may need a pan underneath to catch dripping fat. Smaller air fryers heat more intensely and may cook faster, while larger models may need slightly longer times. The first time you make this recipe in your specific air fryer, check the pork belly a few minutes early to gauge timing. Make notes about what worked so you can replicate perfect results. Most adjustments involve adding or subtracting two to three minutes from the recommended times.
Making Larger Batches
This recipe scales up easily for feeding groups or meal prep. Cook multiple batches rather than overcrowding the basket. Overcrowding prevents proper air circulation and results in steaming rather than crisping. Each batch cooks in the same amount of time, so cooking multiple batches is just a matter of repeating the process. Keep finished batches warm in a low oven while cooking the rest. The rendered fat from early batches should be drained from the air fryer between batches to prevent smoking and maintain optimal cooking conditions.
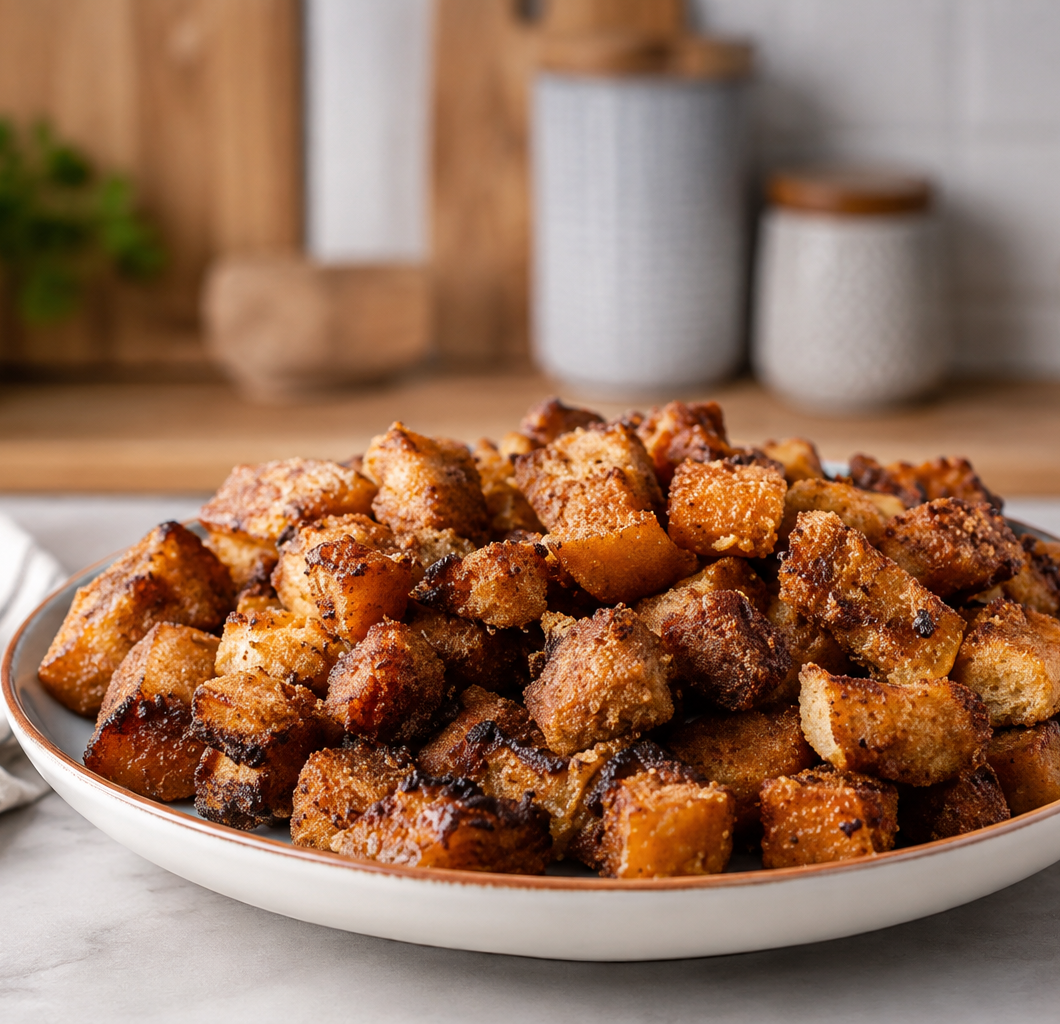
Air Fryer Pork Belly Bites
 Recipe by admin
Crispy, golden pork belly bites with perfectly rendered fat and tender meat inside. This two-stage cooking method creates restaurant-quality results using simple seasonings and an air fryer.
4
servings10
minutes35
minutes45
minutesIngredients
700g-1kg pork belly, cut into 2-3cm cubes
1-1½ teaspoons salt
½ teaspoon black pepper
½ teaspoon garlic powder
½ teaspoon paprika
1 tablespoon oil (optional)
- Optional Marinade:
2 tablespoons soy sauce
1 tablespoon vinegar
1 tablespoon honey or sugar-free sweetener
Directions
- Cut pork belly into uniform 2-3cm cubes. Pat each piece completely dry with paper towels. This drying step is critical for achieving crispy texture.
- Mix salt, black pepper, garlic powder, and paprika in a bowl. Toss pork belly cubes with the seasoning mixture until evenly coated. If using marinade, combine marinade ingredients and toss with pork belly for 30-60 minutes, then pat dry again.
- Preheat air fryer to 180°C (350°F) for 3-5 minutes. Place seasoned pork belly cubes in the basket in a single layer with space between pieces.
- Cook at 180°C for 18-25 minutes, shaking the basket every 5-7 minutes. This low-heat phase renders the fat and tenderizes the meat. Carefully drain accumulated fat from the air fryer drawer.
- Increase temperature to 200-205°C (392-401°F). Cook for 8-15 minutes, shaking every few minutes, until deeply golden and crispy. Let rest for 5-10 minutes before serving.
Notes
- Crispy Texture: Thoroughly dry pork belly before cooking for maximum crispiness.
- Fat Rendering: The low-heat phase is essential. Do not skip it or the bites will be greasy.
- Draining Fat: Always drain rendered fat before the high-heat phase.
- Uniform Cutting: Cut pieces the same size for even cooking.
- Storage: Keep in refrigerator for 3-4 days. Reheat in air fryer for best texture.