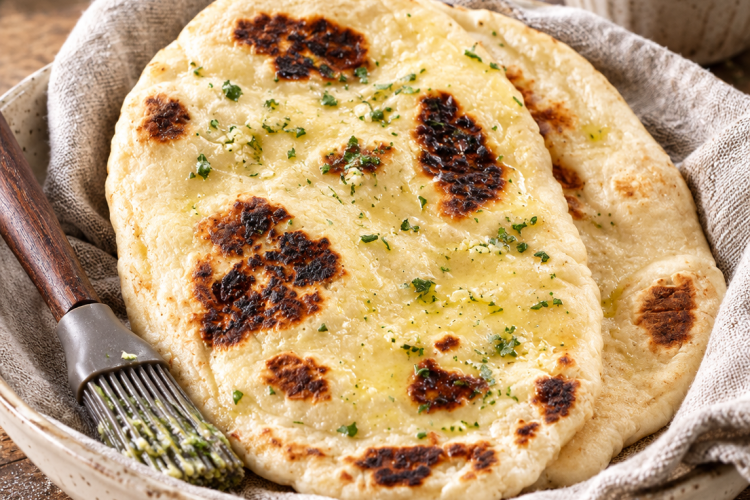
Gluten-free naan bread can be soft, tender, and wonderfully flavorful when prepared with the right combination of ingredients and cooking techniques. This homemade gluten-free naan recipe uses an all-purpose gluten-free flour blend, yogurt, eggs, yeast, and butter or ghee to create a pillowy flatbread with a chewy center and attractive golden-brown spots. Cooked in a skillet rather than an oven, these naan breads are ideal for serving alongside curries, soups, grilled vegetables, and other favorite meals.
One of the best things about this soft gluten-free naan bread is that the dough can be prepared ahead of time. You can allow it to rise on the same day or refrigerate it for several days, making homemade flatbread more convenient during a busy week. Once the dough is ready, divide it into portions, roll each piece into an oval, and cook it in a hot skillet for a few minutes. The result is warm, flavorful naan that is easy to serve fresh from the pan.
What Makes This Gluten-Free Naan So Soft?
The secret to soft gluten-free naan lies in the balance of moisture, fat, and binding ingredients. Traditional wheat-based naan develops its characteristic stretch from gluten, but gluten-free flour behaves differently. Without the same elastic structure, gluten-free dough needs careful handling and ingredients that help it remain tender rather than dry or crumbly. This recipe combines yogurt, eggs, butter or ghee, and a relatively moist dough to create a softer texture.
Plain yogurt contributes moisture, richness, and a mild tangy flavor that complements the other ingredients. Butter or ghee adds tenderness and a subtle richness, while the egg and egg white help bind the dough together. Instant yeast encourages the dough to rise and contributes flavor. Together, these ingredients help create a flatbread that feels soft when warm and develops lightly crisp, golden areas during skillet cooking.
Another important feature is the dough’s consistency. Unlike some traditional bread doughs, this gluten-free naan dough can initially look shaggy, fluffy, and quite wet. That appearance is normal for this recipe. Adding enough flour during shaping makes the dough easier to handle, but using too much flour too early can make the finished bread less tender. The goal is a pliable dough that can be lifted into the skillet without sticking excessively.
Why Make Homemade Gluten-Free Naan?
Homemade gluten-free naan gives you greater control over the ingredients, texture, and cooking process than many packaged flatbreads. Store-bought gluten-free bread products can vary considerably in softness and flavor, while freshly cooked naan can be served warm and adjusted to suit your meal. The slightly tangy yogurt flavor and rich taste of butter or ghee make this recipe a useful addition to a gluten-free cooking collection.
This recipe is also practical because the dough can be made in advance. Preparing it ahead of time allows you to cook individual portions when needed instead of completing every step immediately before dinner. Refrigerated dough can be taken out and shaped as required, which is especially helpful when preparing a curry or another main dish that needs your attention. The short skillet-cooking time makes it easier to serve fresh flatbread without a lengthy baking process.
Another advantage is the versatility of the finished naan. You can serve it with saucy dishes, use it to scoop up vegetables and lentils, or enjoy it as a warm side with grilled foods. It also works well for people who want to prepare homemade gluten-free bread without investing in specialized bread-making equipment. A stand mixer is convenient, but a food processor or sturdy mixing bowl can also be used to bring the dough together.
Understanding the Ingredients
Each ingredient in this gluten-free naan recipe serves a particular purpose. Choosing the correct flour blend, measuring the liquids accurately, and allowing enough time for the dough to develop will help you achieve a consistent result. Because gluten-free ingredients can differ in absorbency, the dough may feel slightly different depending on the flour blend you use. Paying attention to its texture is more helpful than expecting it to look exactly like conventional wheat dough.
All-Purpose Gluten-Free Flour Blend
The recipe calls for an all-purpose gluten-free flour blend rather than a specialized gluten-free bread flour. The blend should be suitable for general baking and should work with the additional xanthan gum specified in the ingredient list. A reliable blend helps provide structure while allowing the naan to remain soft. Different brands absorb moisture differently, so you may need a little additional flour when rolling the dough.
Xanthan Gum
Xanthan gum helps improve the structure of gluten-free baked goods by providing binding and elasticity that ordinary gluten-free flour lacks. In this recipe, it supports dough handling and helps the naan hold together during shaping and cooking. However, some all-purpose gluten-free flour blends already contain xanthan gum. Check the ingredient label before adding more, because the recipe specifically allows you to omit it when your blend already includes it.
Yeast and Sugar
Instant yeast helps the dough rise and contributes the familiar flavor associated with yeast-based bread. Granulated sugar provides a little sweetness, supports yeast activity, and helps balance the other flavors without making the naan taste like a dessert. Instant yeast can be mixed directly into the dry ingredients, which keeps the preparation straightforward. Accurate measuring and suitable water temperature help the yeast perform as intended.
Yogurt, Egg, and Egg White
Plain yogurt gives this naan its moist texture and gentle tang. Using yogurt at room temperature makes it easier to combine with the other ingredients. The whole egg and additional egg white help bind the dough and contribute richness and structure. These ingredients are especially useful in gluten-free bread because they help the dough hold its shape without relying on wheat gluten.
Butter or Ghee
Melted butter or ghee gives the dough a richer flavor and helps keep the bread tender. Ghee is clarified butter and is often used in South Asian cooking, making it a natural choice for naan. Either option can be used in the dough according to the original recipe. Additional ghee or virgin coconut oil is used to grease the skillet, helping the bread cook evenly and develop golden-brown spots.
Salt, Cream of Tartar, and Warm Water
Salt strengthens the overall flavor and balances the sweetness of the sugar. Cream of tartar adds acidity and supports the intended flavor balance alongside the yogurt. Warm water helps the ingredients combine smoothly and supports yeast activity. The recipe specifies water at approximately 95°F, so avoid using very hot water, which may interfere with the yeast. Measuring the water carefully also helps maintain the intended dough consistency.
How to Make Gluten-Free Naan Bread
Step 1: Combine the Dry Ingredients
Begin by placing the gluten-free flour blend, xanthan gum if needed, salt, cream of tartar, and granulated sugar into the bowl of a stand mixer fitted with a paddle attachment. Whisk the ingredients together until they are evenly distributed. Add the instant yeast and whisk again. Mixing the dry ingredients thoroughly helps distribute the yeast and seasonings throughout the dough, giving the finished naan a more consistent flavor and texture.
If you do not have a stand mixer, you can use a large food processor fitted with a plastic blade or a sturdy mixing bowl and spoon. The main objective is to combine the ingredients evenly and develop a cohesive dough. Gluten-free dough does not need traditional kneading to develop gluten, so focus on thorough mixing rather than trying to make the dough behave like conventional wheat bread.
Step 2: Add the Wet Ingredients
Add the room-temperature plain yogurt, melted and cooled butter or ghee, beaten egg, egg white, and warm water to the dry mixture. Start mixing on low speed until the ingredients are combined and the water has been absorbed. Increase the speed to medium and continue mixing for approximately three minutes. This step helps distribute the moisture and fats evenly throughout the flour mixture.
The dough will probably appear fluffy, shaggy, and wetter than conventional bread dough. It may not form a smooth ball inside the mixer, and that is perfectly normal. Turn off the mixer, scrape any dough from the sides of the bowl, and gently press the mixture together with a spatula. Avoid adding large amounts of extra flour at this stage simply because the dough looks sticky.
Step 3: Allow the Dough to Rise
Transfer the dough into a lightly greased container with a secure lid. If you want to make the naan on the same day, cover the container tightly and leave it in a warm, draft-free place for approximately 45 minutes, or until the dough has nearly doubled in volume. This resting period allows the yeast to develop flavor while giving the flour time to absorb moisture, which can make the dough easier to shape.
After the same-day rise, refrigerate the dough for at least 15 minutes before shaping. Cooling helps firm up the moist mixture and makes handling more manageable. Alternatively, you can refrigerate the covered dough for up to five days, as specified in the recipe. The dough will rise gradually in the refrigerator, and you can work with it directly from the fridge when you are ready to cook.
Step 4: Divide and Shape the Naan
Lightly flour a clean work surface and transfer the dough onto it. Sprinkle the surface of the dough with additional gluten-free flour, then divide it into eight approximately equal portions. If you prefer to work with a kitchen scale, you can portion the dough into pieces weighing a little less than 100 grams each. Keeping the portions similar in size helps them cook at a more consistent rate.
Work with one piece at a time, coating it generously enough with flour to prevent excessive sticking. Use your palm to move the dough in a circular motion until it forms a rounded shape. Then use a rolling pin to stretch it into an elongated oval measuring approximately three inches wide and five inches long, with a thickness of around three-eighths of an inch. Handle the dough gently to prevent tearing.
If a portion feels too fragile or sticks heavily to the work surface, gather it together and incorporate a little more flour before rolling again. Gluten-free dough can be delicate, so patience is important. Avoid pressing too aggressively or making the naan unnecessarily thin. A reasonably even thickness helps the bread develop soft centers while allowing the surface to blister and brown in the skillet.
Step 5: Heat the Skillet
Place a cast-iron skillet or another heavy-bottomed pan over medium heat and add approximately one tablespoon of ghee or virgin coconut oil. Allow the fat to melt and spread across the cooking surface. If you are using a nonstick skillet, medium-low heat may work better. A properly heated pan is essential because the naan needs enough heat to develop bubbles and golden spots without becoming burnt before the center cooks.
A skillet that is too cool may leave the naan pale and flat, while excessive heat can brown the outside too quickly. If the bread is not bubbling, check the temperature and the thickness of the dough before making major adjustments. You can cover the skillet briefly if necessary to help the bread cook through, but keep an eye on the surface to avoid burning.
Step 6: Cook Until Puffy and Golden
Carefully lift a shaped portion of dough and place it in the heated skillet. Cook the first side for approximately 30 seconds, or until large blisters begin to form. Flip the naan and cook the other side until it develops golden-brown areas and begins to blister. Turn it again and continue cooking for roughly another 45 seconds, checking that the bread is cooked through and lightly browned.
Cooking times may vary according to the skillet, heat level, and thickness of each portion. If needed, gently press the naan with a spatula so that more of its surface makes contact with the pan. The bread should puff back up when released and show signs of cooking through. Avoid pressing continuously or flattening the bread too firmly, as this can interfere with its soft, airy texture.
Step 7: Keep the Naan Warm and Repeat
Once a piece of naan is cooked, remove it from the skillet and place it on a paper towel or clean tea towel. Cover it to help retain heat and moisture. Repeat the process with the remaining dough portions, adding more ghee or coconut oil to the pan whenever necessary. Stack the cooked naan pieces together and keep them covered until the entire batch is ready to serve.
For the best texture, serve the naan while it is still warm. Covering the bread helps prevent the surface from drying out while you finish cooking the remaining pieces. If you are preparing a complete meal, you can make the naan toward the end of the cooking process so it reaches the table alongside the main dish. Freshly cooked naan is particularly enjoyable when paired with flavorful sauces.
Expert Tips for the Best Gluten-Free Naan
Work with Chilled Dough
Although you can prepare and cook the naan on the same day, chilling the dough makes the shaping process easier. A short refrigeration period after the initial rise helps firm up the dough, while longer refrigeration allows you to prepare it in advance. The original recipe allows the sealed dough to remain refrigerated for up to five days. Always keep it covered properly and follow appropriate food-storage practices for a dough containing eggs and yogurt.
Add Flour Gradually During Shaping
A sticky dough does not necessarily mean that the recipe has gone wrong. Gluten-free flour blends vary in how much liquid they absorb, and this recipe intentionally starts with a relatively wet mixture. Sprinkle flour onto the work surface and dough as needed, adding small amounts until each portion can be rolled and lifted. Using too much flour can make the finished bread less tender, so aim for easy handling rather than a completely dry dough.
Use the Correct Skillet Temperature
Medium heat generally works well with a cast-iron or heavy-bottomed skillet, while a nonstick pan may need medium-low heat. The naan should develop bubbles and light golden-brown patches without scorching. If the bread browns immediately but remains undercooked inside, reduce the heat slightly. If it remains pale and does not blister, the pan may need more time to heat. Adjusting the temperature gradually is better than making sudden, extreme changes.
Pay Attention to Thickness
Rolling each piece into a similar size helps the naan cook evenly. Very thick pieces may need additional time, while extremely thin pieces can become crisp rather than soft. The recommended oval shape and approximate three-eighths-inch thickness provide a useful guide. If the dough tears, gather it gently, add a little flour, and roll again. Small imperfections are normal in homemade flatbread and do not affect its usefulness as a side dish.
What to Serve with Gluten-Free Naan
Soft homemade naan pairs naturally with Indian-inspired meals, especially dishes that have a rich sauce or gravy. Serve it with vegetable curry, lentil dal, chickpea curry, or a creamy chicken dish. Its tender center makes it useful for scooping up sauces and vegetables, while the lightly browned surface adds a pleasant contrast. You can also place warm naan beside rice dishes, roasted vegetables, or grilled proteins for a more varied meal.
This gluten-free flatbread is equally useful for simple lunches and casual dinners. Serve it with a bowl of lentil soup, a vegetable stew, or a plate of roasted vegetables with a yogurt-based dip. Because the naan is relatively soft and easy to tear, it can be used in place of other bread options when a meal calls for something to accompany a sauce. For a complete gluten-free meal, check that the accompanying sauces, seasonings, and other packaged ingredients are also gluten-free.
Make-Ahead and Storage Guidance
One of the most practical features of this recipe is the ability to prepare the dough before you need it. After mixing, place the dough in a tightly covered container and refrigerate it for up to five days, following the recipe’s instructions. When you are ready to cook, take out the amount you need, shape the portions on a floured surface, and cook them in a skillet. This approach can make dinner preparation quicker on busy evenings.
Cooked naan is best enjoyed warm and fresh, when its center is especially soft. If you have leftovers, allow them to cool and store them in a suitable airtight container in the refrigerator. Reheat the pieces in a skillet over low heat until warmed through, adding only a little moisture if needed to help restore tenderness. Avoid overheating, as this can dry out gluten-free bread more quickly than expected.
For longer storage, you can freeze cooled naan in a freezer-safe container or bag, separating individual pieces with baking paper if you want to remove them one at a time. Thaw the portions as needed and reheat them gently in a skillet. Storage quality depends on how quickly the bread is cooled, packaged, and reheated, so use sensible food-handling practices and discard any bread that shows signs of spoilage.
Frequently Asked Questions
Can I make gluten-free naan without a stand mixer?
Yes. A stand mixer with a paddle attachment makes mixing easier, but it is not essential. You can use a large food processor with a plastic blade or mix the ingredients vigorously in a sturdy bowl with a spoon. The goal is to combine the ingredients thoroughly and create a consistent dough, not to knead it as you would traditional wheat bread.
Why is my gluten-free naan dough sticky?
The dough is meant to be relatively wet, so some stickiness is expected. Gluten-free flour blends absorb moisture differently, and chilling the dough helps make it easier to handle. Sprinkle additional gluten-free flour onto the dough and work surface during shaping. Add it gradually until the portions can be rolled and lifted without sticking excessively.
Why is my naan not puffing up?
A skillet that is too cool or dough that is rolled too thick can prevent the naan from forming noticeable bubbles. Make sure the pan is properly heated before adding the dough, and roll the portions to a reasonably even thickness. You can cover the skillet briefly if needed to help the bread cook through, while checking frequently to prevent burning.
Can I prepare the dough the night before?
Yes. The dough can be mixed, placed in a tightly sealed container, and refrigerated overnight. According to the recipe, it can remain refrigerated for up to five days. Chilling the dough also helps make it easier to shape. Keep the container properly sealed and handle the dough safely because it contains egg and yogurt.
Can I use honey instead of granulated sugar?
Yes. The original recipe notes that you can replace the granulated sugar with half as much honey and reduce the water by one tablespoon. This adjustment changes the ingredient proportions slightly, so measure carefully. The honey provides sweetness while helping support yeast activity, and the reduced water helps account for the additional moisture introduced by the substitution.
Is this naan suitable for a gluten-free diet?
The recipe is designed to be gluten-free when prepared with an appropriate gluten-free flour blend and other verified gluten-free ingredients. Check product labels for the flour blend, yeast, and any other packaged ingredients. If you are preparing food for someone with celiac disease, prevent cross-contact by using clean utensils, cookware, and work surfaces that have not been contaminated with wheat flour.
Serving Suggestions and Final Notes
This soft gluten-free naan is a useful recipe to keep on hand when you want homemade bread without wheat flour. Its yogurt-enriched dough, buttery flavor, and skillet-cooked surface make it suitable for everyday meals as well as special dinners. Whether you prepare the dough in advance or make it on the same day, the most important details are allowing the dough time to rise, using enough flour to shape it comfortably, and cooking each piece at a suitable temperature.
For the most consistent results, measure the ingredients accurately, check whether your flour blend already contains xanthan gum, and keep the dough covered whenever it is resting. Make sure the skillet is hot enough to create bubbles without burning the bread, and cover the cooked pieces with a clean towel to retain moisture. With these simple techniques, you can prepare homemade gluten-free naan that is soft, flavorful, and ready to accompany your favorite dishes.
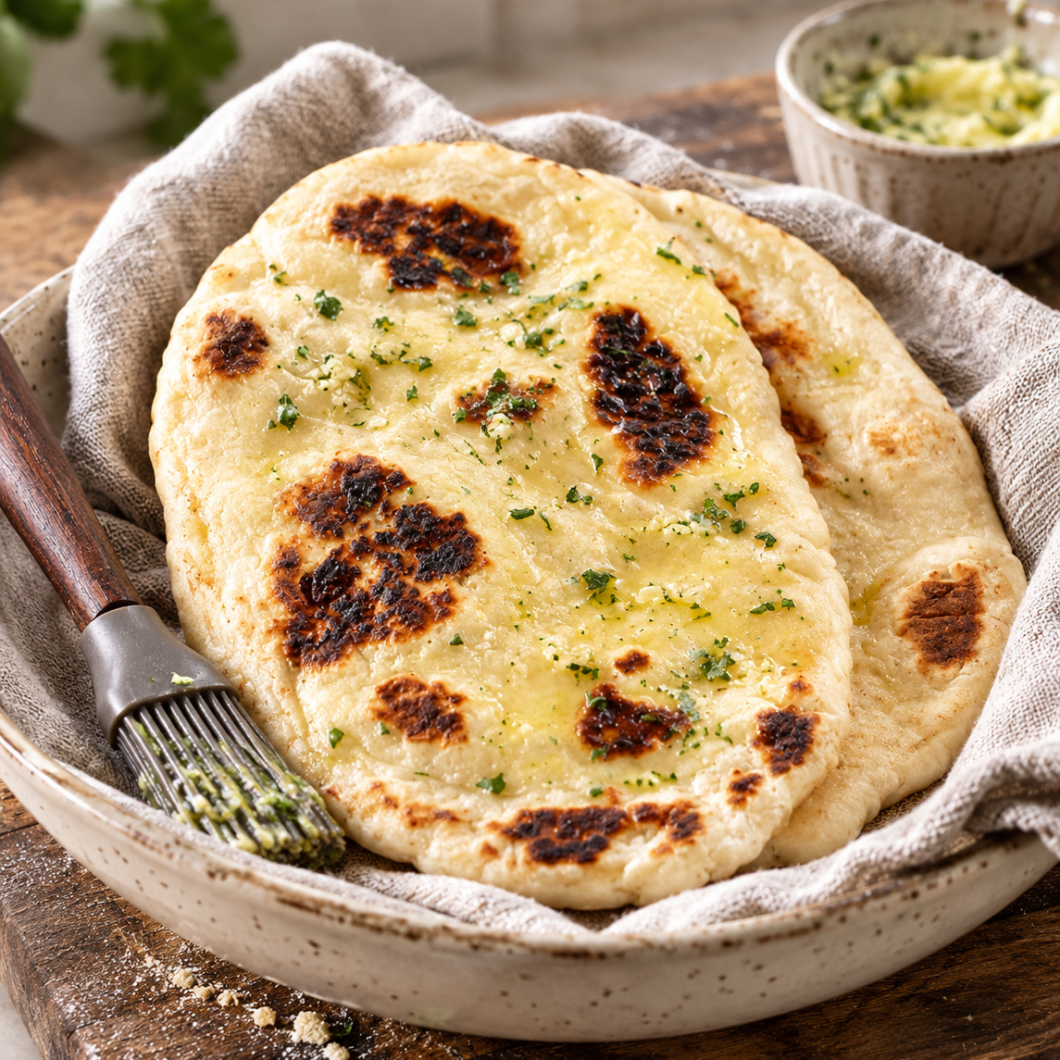
Softest Gluten-Free Naan
Soft, tender, skillet-cooked flatbread made with gluten-free flour, yogurt, eggs, and butter or ghee.
8
servings30
minutes10
minutes281
kcal45
minutes1
hour25
minutesIngredients
2 ½ cups (350 g) all-purpose gluten-free flour blend, plus more for sprinkling
2 ½ teaspoons xanthan gum, omit if your blend already contains it
½ teaspoon kosher salt
¼ teaspoon cream of tartar
4 ½ teaspoons (18 g) granulated sugar
2 ¼ teaspoons (8 g) instant yeast
⅓ cup (76 g) plain yogurt, at room temperature
3 tablespoons (42 g) butter or ghee, melted and cooled
1 large egg (50 g, weighed out of shell), at room temperature, beaten
1 egg white (25 g), at room temperature
¾ cup (6 fluid ounces) warm water, approximately 95°F
Ghee or virgin coconut oil, for frying
Directions
- Mix the dry ingredients.
Combine the gluten-free flour blend, xanthan gum if needed, salt, cream of tartar, and sugar in a stand mixer bowl fitted with a paddle attachment. Whisk well, then add the instant yeast and whisk again. - Add the wet ingredients.
Add the yogurt, melted and cooled butter or ghee, beaten egg, egg white, and warm water. Mix on low speed until combined, then increase to medium speed and mix for approximately three minutes. - Let the dough rise.
Scrape down the bowl and gently gather the dough together. Transfer it to a lightly greased, tightly covered container. For same-day preparation, let it rise in a warm, draft-free place for approximately 45 minutes or until nearly doubled. Refrigerate for at least 15 minutes before shaping. - Prepare the dough portions.
Alternatively, refrigerate the sealed dough for up to five days. Turn the dough onto a lightly floured surface and divide it into eight portions. Sprinkle each piece generously with gluten-free flour. - Shape the naan.
Roll each portion into a smooth round, then flatten it into an elongated oval approximately 3 inches wide, 5 inches long, and ⅜ inch thick. If the dough tears or sticks excessively, gather it together and incorporate a little more flour. - Heat the skillet.
Heat approximately one tablespoon of ghee or virgin coconut oil in a cast-iron skillet over medium heat. If using a nonstick skillet, use medium-low heat. - Cook the first side.
Place a shaped piece of dough in the hot skillet. Cook for approximately 30 seconds, or until large blisters begin to appear. - Flip and finish cooking.
Turn the naan over and cook until the underside is golden brown and blistered. Flip again and cook for approximately another 45 seconds, or until browned and cooked through. - Keep warm and repeat.
Transfer the cooked naan to a paper towel or clean tea towel and cover it. Repeat with the remaining portions, adding more ghee or coconut oil as needed. Stack the cooked naan under the towel and serve warm.
Notes
- Flour blend: Use an all-purpose gluten-free flour blend suitable for baking, rather than a specialized gluten-free bread flour.
- Xanthan gum: Omit the additional xanthan gum if it is already included in your flour blend.
- Dough consistency: The dough should be moist and slightly sticky. Add extra flour gradually when shaping.
- Sugar alternative: The original recipe allows replacing the sugar with half as much honey and reducing the water by one tablespoon.
- Skillet temperature: Avoid excessive heat, which can burn the outside before the naan cooks through.
- Make-ahead option: Refrigerate the tightly covered dough for up to five days, as specified in the recipe.
- Serving: Keep cooked naan covered with a clean tea towel and serve warm for the softest texture.
Nutrition Facts
8 servings per container
- Amount Per ServingCalories281
- % Daily Value *
- Total Fat
11g
15%
- Total Carbohydrate
39g
15%
- Total Sugars 3g
- Protein 5g 10%
* The % Daily Value tells you how much a nutrient in a serving of food contributes to a daily diet. 2,000 calories a day is used for general nutrition advice.